Official Julia Menn Website                             
  • Home
  • News
  • Resume
  • Bio
  • Photos
  • Production Photos
  • Media
  • Contact
  • Blog

Ruminations

8/3/2012

2 Comments

 
What did people do before technology? I bet they were way more invested in other people - family and community life.  Now we just sit alone in our tiny apartments, staring at a bright screen that has probably messed up our vision for life, "interacting" with the world.  True, there are great benefits of all these technological advances - such as you being able to read what I'm writing wherever you are, making friends around the globe, keeping in touch with people is way easier these days than back in the age of the Pony Express.  But then your gadgets and gizmos get all sorts of problems that you have absolutely no idea how to begin to try to fix, so you get super angry and annoyed and frustrated and want to just scream.  And so much doesn't get done because you park yourself in front of the glowing screen and just waste time - looking at pictures, reading mindless cartoons and captions, or just waiting for someone to get on Facebook so you can "chat".  And I am totally one of these people. 

The great thing about going to Guatemala was that I was totally disconnected from technology for 9 whole days.  My phone didn't work, I didn't have my computer, the only piece of equipment I brought was my camera.  I could focus on myself, the people I was with, the reason I was there - I was forced to let go and relax, live in the moment.  And it was wonderful.  I did better when I first got back to NY about not being online all the time, but that has slowly slipped away and I find I'm using every spare minute online, just browsing around wasting time.  There is a list of things I've been needing to do for over a week - and instead of doing them when I have all this random free time, I don't feel like "working" and just sit around instead.  Oh Julia, what has happened to you? 

So, Monday night I was depressed, but Sarah had said she'd go to Ballet w/ me, so I put on my tights and leotard and went.  I'm so very glad I did.  It helped me re-focus.  I feel God's put me in this "patient" phase, where I'm supposed to be doing all I can do learn and grow in my abilities. It's frustrating, but if that's why I'm here right now, I need to be studious in my efforts.  I'm growing in leaps and bounds with my singing, but this past month I've truly let my dancing slip. I used to take 2-3, sometimes 4, classes a day! So, I will be getting my tush into ballet, theatre dance, and especially tap a lot more this month.  I should work double hard so I can feel like I've earned a short break - in case I get the chance to go back home in Sept. 

And I honestly do need to start tackling all the things I've been putting off. I brought some produce today - so now I have food to eat = always a good thing.  Next up, clean the bathroom, put sheets on my bed, update my audition book, and figure out why my kitchen smells.  Ok, I pride myself on my kitchen - I am constantly making delicious food that smells wonderful. However, the past few days every time I come home, I'm hit with a whiff of...something.  I've taken the trash out several times (chicken always smells gross, esp. in this heat), I've cleaned the dishes, I know it's not the cat, but I still can't figure out where the smell is coming from or what it is.  I suppose it's time to move everything around and clean EVERYTHING.  I honestly hope that fixes the problem.  Carolyn can't ever smell anything different, but I'm not crazy - there's something rank in my kitchen.  I will find and eradicate the perpetrator! 

Also, this month I'm swearing off swearing.  My brother John and his girlfriend are not drinking during the month of August, so I figured I could not swear for the whole month.  It's a terrible habit I've gotten into since moving to NY.  I've slipped up a few times, but I always catch myself.  Time to figure out some better exclamations. 

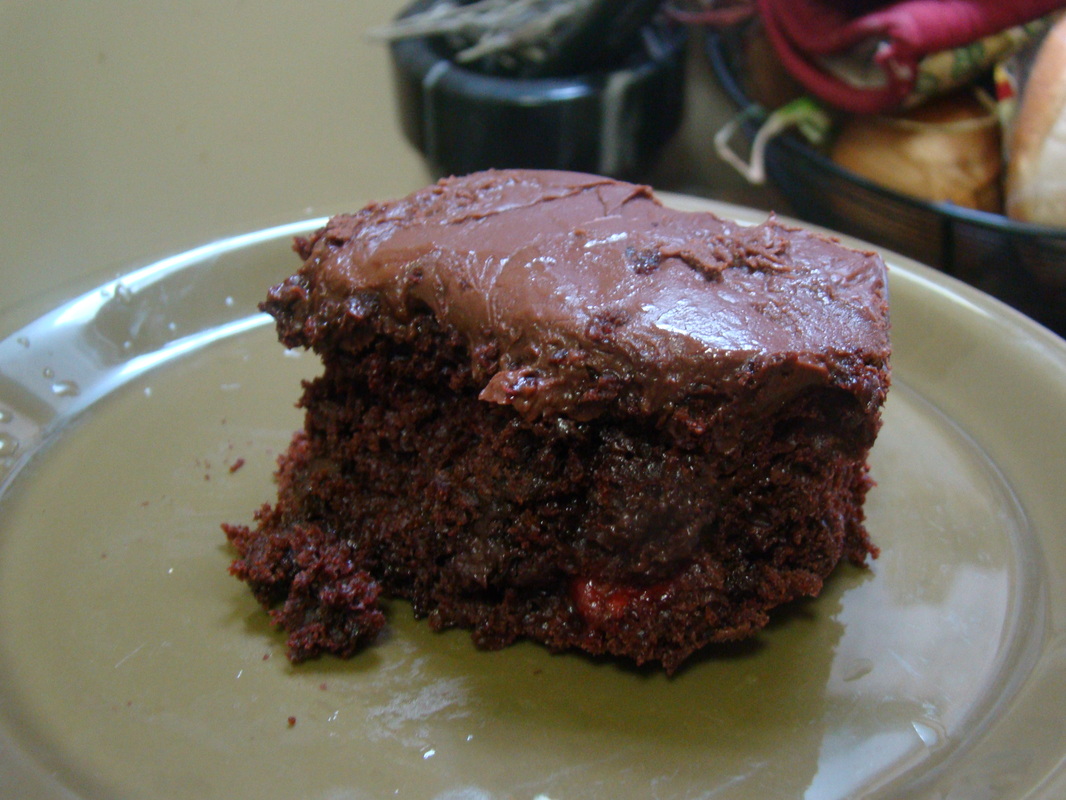
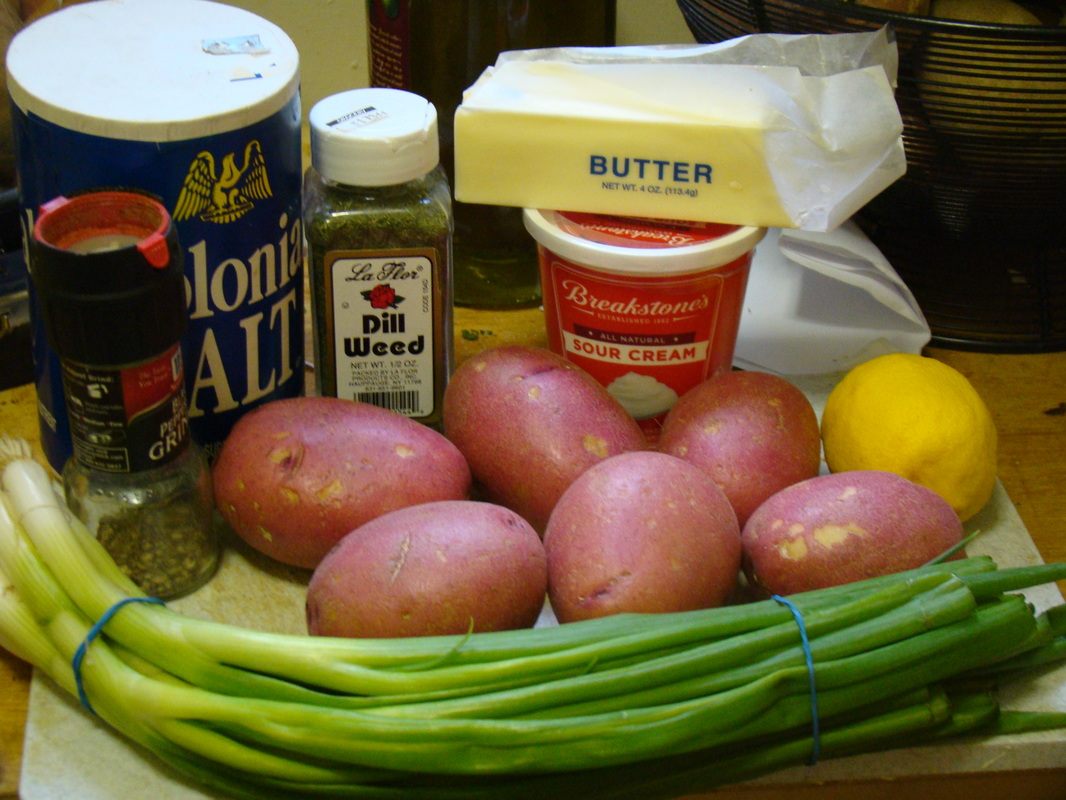
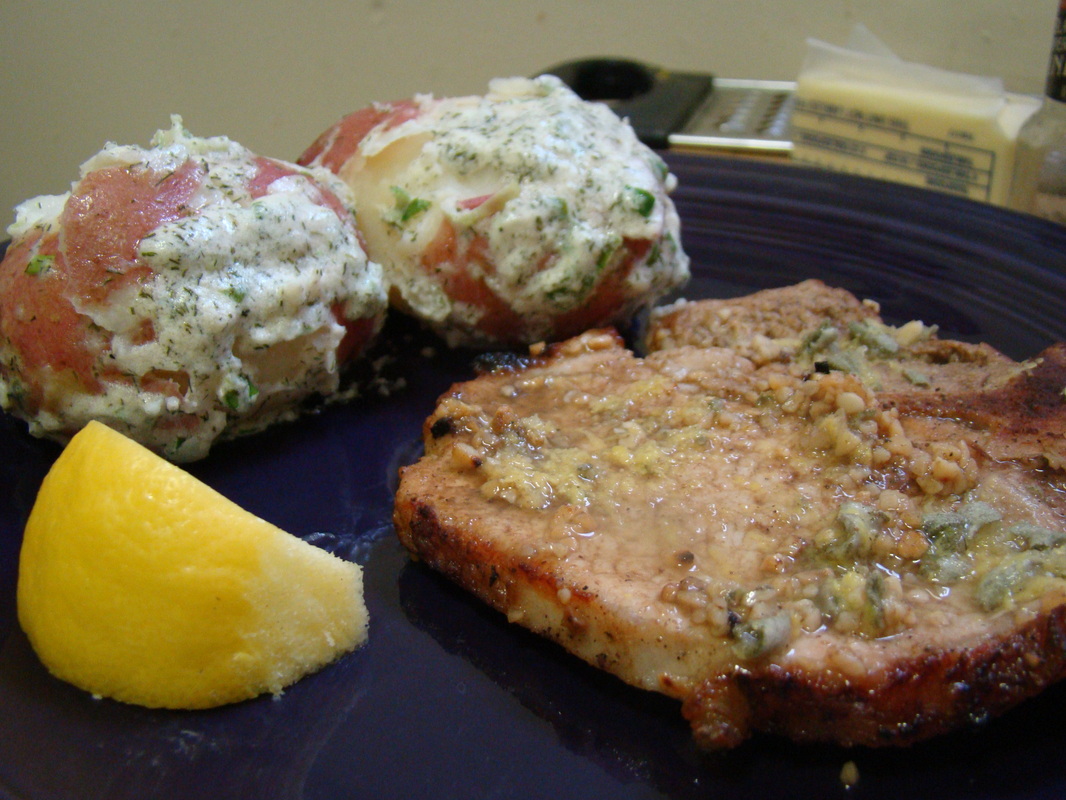
Because it's so hot, I'm going to share with you, dear readers, a PFC wk 6 recipe - flavored ice cubes.  On Pinterest, they are made with fruit, but I had some lime and basil laying around, and wanted to use them up. I just had a glass of water with one of them in - and it was delicious.  But, while you read the recipe, you should listen to this song by Vitas (because he's amazing):
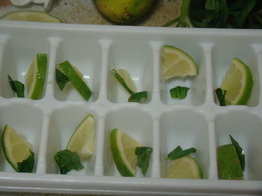

Picture
Flavored Ice Cubes
Lime
Basil
Water

(This is such a difficult recipe.  Seriously, guys, only try this if you're up for a challenge).

1. Cut up the lime into little wedges, tear up the Basil, put in your ice tray, cover with water, and freeze. 


Picture
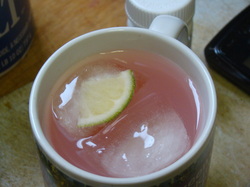
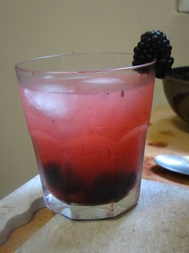
2. Pop in your beverage and enjoy!

*This can be made with any combination, and I see it most often with fruit - blueberries/raspberries/strawberries etc.


2 Comments

Organizing My Life

7/27/2012

3 Comments

 
What an auspicious title!  I wish it was in respect to every aspect of my life.  However, one thing at a time (or in my case, usually 3 or 4).  However, today I'm referring to coming up with a much better way to get a handle on my PFC.  I had all the pictures in folders in an album on my computer with the title, but they were all mixed up and I was relying on my memory to figure out which week I did them, if I'd already blogged about them, etc. - not the smartest idea, seeing as how I can barely remember what I did yesterday.  So, I went through the album titling each folder with "wk (number) (recipe name)" and if I'd already blogged about them, adding a "-" in front of the wk number.  I should also come up with some way to denote recipes worth making again and/or ones to go in my own recipe book.  Because, as we all know, dear readers, not everything in this PFC has been a success :P 

I also realized how freaking far behind I am on blogging my results to you all!! I'm already on week 11 but haven't even blogged past week four!  Oi.  Julia, what am I going to do with you?  So, I also thought, I should do some sort of weekly roundup - write about whatever I made that week, no ifs, ands, or buts.  (I totally always thought my mom was saying, "No if, sands, or butts." when I was little.  hehe.)  No more of this random picking and choosing, of which I seem to be in the habit. I had thought about only relaying the recipes which were surefire successes, but that wasn't the whole point of this.  I started out to try a whole lot of different recipes and write about them - good and bad, successes and embarrassments.  And who knows - you might figure out a way to fix a recipe that was a flop in my book, and everyone has different tastes, anyway. 

It'll be good to get back into the habit of writing.  Ever since I moved to NYC I've had absolutely zero inspiration to write what I used to love writing (which I believe I mentioned is one of the reasons I started this blog - at least I'm writing something).  A friend told me some things she'd like to read about, and rest assured they will be notated :)  So, if there's anything your little heart desires to see written about here on this little blog, let me know - it'll probably show up! 

So, since I just spent a lot of time discussing how organized I'm going to be with this whole PFC, there's no time like the present, is there?

A friend came over and we made a feast of Braised Zucchini, Roast Chicken, and knocked back a few Seductive Swans.  Let us start with the Seductive Swan - because I'm a cook who drinks while she cooks. (These are all from week 4)

Picture
Seductive Swan (Picture recipe)
1.5 oz Vodka
5 Blackberries
3 oz lemonade
Ice

Muddle 4 blackberries in the bottom of the glass. Put 2 ice cubes in. Add vodka (I eyeball liquor measurements), top off with lemonade. Garnish with remaining blackberry.

This is refreshing and very pretty - definitely one of my staple drinks here at home.


Picture
Braised Zucchini (orig. Recipe)
2 Zucchini, cut into strips
Cherry Tomatoes, cut lengthwise
3 Cloves garlic, chopped
Olive Oil
Salt and Pepper
A few fresh Basil leaves, torn

1. Heat olive oil in a skillet, then add zucchini - cook quickly until browned. Remove zucchini to a bowl.
2. Add a bit more oil, then saute the chopped garlic 30 seconds, then add cherry tomatoes (I used probably half of the square container they come in - base it on how much zucchini you have).
3. When tomatoes soften, add zucchini back into pan. Season with salt and pepper, toss.  Add basil, toss again. Serve warm.

Unfortunately, because I was doing several things at once, trying to get the chicken ready and whatnot, to my chagrin the zucchini came out rather over done.  This recipe has potential - just make sure you don't over cook it!


Picture
Roasted Chicken in the Crockpot (orig. Recipe)
3 1/2 - 4 1/2 lb roasting chicken
1 med/large onion, chopped
4-5 Carrots, scrubbed and chopped
4 Celery stalks, chopped
2 Cloves garlic, smashed
1 Lemon, quartered
(And butter, apparently - see, this is what happens when I don't write this stuff down right away - I don't remember what the heck I do!)


Picture
Rub
4 tsp salt
2 tsp Paprika
1 tsp Cayenne Powder
1 tsp Onion Powder
1 tsp Thyme
1/2 tsp Garlic Powder
1/4 tsp pepper


1. Combine rub ingredients in a bowl. 
2. Make sure there aren't any innards in the chicken. Rinse chicken and pat dry with a paper towel. 
3. Rub smashed garlic all over chicken, then pop inside the cavity.  Slather melted butter over this bad boy (I named him Alfred), then rub that rub all over his tub.  (Ok, what? Seriously, Julia? Sorry - moving on). Make sure you get under his skin.  Stuff him with the lemon quarters. (I just realized how dirty preparing a chicken can sound. But maybe that's just me...)
4. Place chopped veggies in a crock pot. Put Alfred (or whatever you've named your chicken) on top. Feel free to splash some white wine over - though the recipe doesn't call for any liquid.  Cook on low 4-8hrs. Alfred was only 3 lbs, so he was does in like, 4hrs. Cooking time depends on the size of your bird and your crock pot temperature.
5. Remove Alfred (or similarly named fowl), place in some sort of heat-proof dish/pan, and pop in the broiler for 4-5 minutes to crisp up the skin.  Serve with delicious (and not over cooked) sides!

Picture
Apologies for the terrible picture - somehow I got through this evening without taking a great picture of Alfred nicely cut up and served with a side of braised zucchini with a seductive swan blurry but recognizable in the background. Oh well. 

My friend and I agreed we didn't like the rub - it was too spicy.  Now, don't get me wrong, I love me some spice. But it just tasted really weird on roast chicken.  It's a good base recipe - with the veggies and cooking a whole chicken in the crockpot (the lemon keeps the chicken moist - and this chicken certainly was juicy!), but if I ever try this recipe again, I'll definitely do different spices - lemon pepper/tuscan sunset spices, something along those lines. 

So, unfortunately, this dinner was a bit disappointing all around for me - but the drink was delicious! And my friends always seem to be happy to let me experiment my food on them :)

Until next time, dear readers.

3 Comments

PFC Update

7/11/2012

0 Comments

 
Oh, my dear readers.  What a state in which I have found myself.  When I first started my Pinterest Food Challenge, I had a mere 129 pins.  Today, 2 months and however many odd days later, I have 399 pins.  Even if I made 1 every day for the rest of the year, I'd still be going into next year.  I suppose I knew this was a rather endless project, and it will always give me something to do. 

Anyway, because I was gone and then doing an intensive, I didn't cook for 2 weeks - though I had made enough recipes before then to cover my two week absence.  And it has been a lengthy while since I last posted about food, glorious food!  So, without further ado, here are a few recipes you might enjoy.  Forgive the lack of pictures in some - I am absolutely terrible at remembering I'm supposed to track every step, and sometimes I'm in a hurry, or am doing twelve things at once in the kitchen to make everything ready at the same time. 

Banana Chocolate Chip Muffins - week 5 (orig. recipe here)
1 1/2 C flour (I used whole wheat)
2/3 C sugar
1 1/2 tsp baking powder
1/2 tsp salt
2 large ripe bananas, mashed
1 large egg
1 tsp vanilla
1/2 C butter melted
1/4 C milk
chocolate chips
Picture
1. Preheat oven to 350 degrees. In a large bowl, sift flour, sugar, baking powder, and salt.  *The bananas look like that because I freeze them as they start going bad, so then I can take them out and they're perfectly good to bake.  Take them out to thaw about an hour before, or run them under hot water.
Picture
2.  In a different bowl, mash the bananas, then add in egg, vanilla, butter, and milk.
Picture
3. Add banana mixture to dry mixture and mix until just blended - don't over mix. 
Picture
4. Add in chocolate chips.
Picture
5.  Fill up muffin tins about 3/4 and cook for 25ish minutes - until a toothpick inserted in the center comes out clean.  I sprayed the muffin tins with cooking spray, though it's not necessary - they didn't stick that much coming out.
Picture
My Thoughts: These are the best muffins I have ever had!  They are super easy to make and pretty healthy and just sooooo good!! I think Caro was still gone in Alaska when I made these, so I got them all to myself.  I ate them for several days - great on the go breakfast or snack.  They were pretty compact and filled me up.  This recipe is definitely going into my cookbook.

Apple Pie Bites - Wk 3 (orig. recipe here)
1/2 C sugar
2 tsp cinnamon
1 pkg Pillsbury crescent rolls
3 Tbls Butter, melted
1 Green apple
Picture
I modified the recipe since I was the only one home - I couldn't find pie dough, so I bought the crescent rolls (for some reason not pictured here), and I quartered the apple instead of cutting it into 8ths.  So I just meshed the crescent rolls together to make 4 rectangles (below).
Picture
1. Preheat oven to 425 degrees. In a small bowl, mix sugar and cinnamon.  Brush the unrolled pastry with some of the melted butter and sprinkle (liberally) with the cinnamon sugar.
Picture
2. Cut the apple into quarters and roll up in the dough. I left the skins on because I was lazy and in a hurry, but next time I'd definitely peel it first.  After it's rolled up, brush top of the pastry with butter and cover in cinnamon sugar.
Picture
3. Bake 15 minutes, or until pastry is golden brown. Serve warm.
Picture
My Thoughts: These were pretty tasty.  I ate all four of them as I was watching Pride and Prejudice.  I still have left over cinnamon sugar to use, as well.

Chicken Teriyaki - wk 4 (orig. picture recipe here)
3 Chicken breasts, cubed
Can of pineapple, drained
Carrots
1 Med. onion, chopped
1/4 C. Teriyaki sauce

1. Combine all ingredients in a crockpot and cook on low for 8hrs or high for 4hrs. Serve with rice.
Picture

My Thoughts: I followed the picture recipe as best I could, but I was not impressed with the end result.  Maybe I needed to use a better teriyaki sauce?  Who knows.  But I will definitely not be making this again.
0 Comments

PFC: Triple Chocolate Cherry Bars (wk 4)

5/30/2012

2 Comments

 
I feel like it's been such a long time since I last posted.  So, I figured it was about time for a new recipe!  And this one is a keeper, dear readers.  I took it to two events and it was raved over.  The best part?  It's soooo easy!! 

Triple Chocolate Cherry Bars (Orig. recipe courtesy of Betty Crocker :)
1 Box Fudgey/Chocolatey Cake
1 Can Cherry Pie Filling
2 Eggs
Chocolate Chips
1 Container Whipped Frosting
Picture
I know, I know.  It might be considered heinously sacrilegious to be using Duncan Hines for a Betty Crocker recipe, but the store had a small selection and I'm not a practicing member of the Betty Crocker Baking Religion.  Sue me.   
Picture
1. Preheat oven to 350 degrees. Put cake mix in a large mixing bowl.  See all those nasty lumps?  Yeah - I like sifting my cake mix so I can avoid having to find and crush those annoying lumps in the batter. 
Picture
2. Dump the cherry filling, eggs, and chocolate chips on top and mix. 

   The original recipe called for mini-chocolate chips, but I didn't have any and neither did the store.  I mean, the only difference is that the mini ones would completely melt into the cake.  I have yet to find someone upset to find a delightful, hard little chocolate surprise in their dessert. 
  And I didn't add a measurement for the chocolate chips because who needs to measure that?  Use as much as you want!  :)
Picture
Just look at that gooey wonderfulness.
Picture
3. Grease your cake pan.  I had run out of PAM Baking Spray, but thankfully I had Crisco.  My mom taught me this method of using Crisco to grease pans - quick, easy, and mess-less!
Picture
BAM! Look at that wonderfully greased pan.
Picture
4. Plop it in the cake pan (13x9) and cook for 30 min (or until toothpick comes out clean).
Picture
In the meanwhile, enjoy the left over batter!  And hey - my spatula is Betty Crocker brand.  So I'm not a complete traitor...
Picture
5. Frost!
Picture
6. Enjoy the deliciousness!  And share it with a lot of people - they will love you and laud your genius dessert making skills ;)


Also, I may be jumping around w/ the recipes I post - as this one is from wk 4 but I haven't posted all wk 3 recipes.  But, I AM sticking to my Pinterest Food Challenge by making and photographing all the recipes I try, and I will post them all in good time.  I just don't want to overload your senses and make you crazy jealous of all the food I've been eating, all at once.  I'm nice like that ;)
2 Comments

PFC Conundrum

5/25/2012

2 Comments

 
So, the thing with my Pinterest Food Challenge is, I keep adding recipes.  Which is great - I mean this will be an ongoing project for years.  But with so very many recipes I'm thinking I should be more organized about it - maybe get more done that way.  Because of the huge variety of pins, I have no idea which ones would go well together - this entire experiment is hit-and-miss, but I should start picking out dishes that look like they go well together and make an entire meal - or at least a main dish + drink, or main dish + dessert, etc. 

Another issue I've come across - I'm only one person.  My rm is gone visiting her family at the moment and 1. I like more than 1 opinion on my food, 2. It's nice cooking for more than just myself, and 3. I seriously can't eat nearly as much as when I was in 6th grade!  I find myself wanting to cook every day, but honestly, I'm not hungry enough to do that.  Or I have left overs I need to finish before making something new, or need to clear out room in my 'fridge.  Or, like yesterday, a small round of smoked gouda and some crackers kept me set the whole day :P 

I'm thinking maybe I should invite one or two people over every week and cook for them - close friends who understand that I'm experimenting and it might turn out completely disastrous!  I love entertaining, but I would still probably get stressed out about whether the food is good or not. Also, my friends are always super busy and scheduling something can be difficult.  And cooking is my get-away hobby/pleasure and shouldn't be stressful, in my opinion.  Oh, and my Bible Study group, for which I usually make some sort of dessert, is taking a break for the summer - so there goes another avenue of testing food out :( 

I guess I'm really just talking myself in circles here.  What are your suggestions??
Picture
I miss cooking for this crazy sunflower girl :P
2 Comments

PFC Week 3:Honey Bourbon Pulled Chicken

5/22/2012

2 Comments

 
I'm really tired right now, and the constant pounding/drilling happening next door has brought on a massive headache.  Yesterday was a great day - 4 dance classes, making food, and singing (which resulted in a finally usable video I was able to post on my site - go over to Media and watch Stop and See Me).  But that much dancing tired me out (in the best way possible - and gave me some wicked cool callouses! WOO! I feel accomplished now :P), yet sleep eluded me for far too long, and then I got up early-ish this morning for an audition.  I'm glad I went - always a learning experience.  Though some day it would be great to start getting callbacks and even, GASP, Book the Job!!  I'm sure that will all come.  Eventually...

Anyway, after all my activities yesterday, today has brought a pretty chill afternoon and lack of drive to do anything.  So, why not post a PFC recipe for you all?  Good idea, Julia.  Soooo, here's a recipe from week 3.

Honey Bourbon Pulled Chicken (original recipe found here)
1 C ketchup
1/2 small onion, chopped
1/4 C Bourbon
1 TBLS Honey
1 TBLS Apple Cider Vinegar
1 TBLS Molasses
1 tsp tomato paste
1 tsp Worchestershire sauce
2 Garlic cloves, smashed
1/4 tsp ground ginger
pinch Cayenne Pepper
pinch salt
4 boneless, skinless Chicken Breasts
Sandwich Rolls
pickle slices (optional)
Picture
Good lookin' lineup, folks.
Picture
1. Add everything (except Chicken) to the crockpot.
Picture
2. Mix it all up, then add the chicken - covering well.
Picture
3. Cook on low 8hrs or high 4hrs.  I cooked on high for 4hrs, and with 1/2hr to go, I shredded the chicken right in the crockpot - it was pretty well falling apart on its own.  Stir it around and continue cooking so it can soak up all the flavor of the sauce.
Picture
My Thoughts:  I wish my rm had been around to try this - I would've liked a second opinion.  It was fine, but it didn't blow me away.  I'm not exactly sure what I didn't love about it - but I'm thinking maybe it was the cup of ketchup - too much.  And even though I doubled the amount of chicken, it still seemed a bit too...soupy. 
  If I ever tried this again, I would probably just use a pre-made sauce, and add bourbon to it - because I mean, hey, who doesn't like alcohol added to their food?  Honestly.  But I mean, I was really hungry that day, so I snarfed 4 down no problem.  And the leftovers came in handy yesterday when I was dashing from dance to singing with half an hour to spare to grab a bite when I was home.  But it wasn't mouth-gasmical.  I definitely thought the best part was the pickles.  Just sayin'.
2 Comments

PFC Week 2: Double Header

5/16/2012

2 Comments

 
Week 2 of my Pinterest Food Challenge I tried two new recipes - Creamy Garlic Pasta, and Herbed Potatoes.  Check 'em out.

Creamy Garlic Pasta (original recipe found Here)
Olive Oil
4 TBLS garlic, minced
4 TBLS butter
salt and pepper
4 C chicken stock
1 lb angel hair pasta
1 C grated parmesan cheese
1 C heavy cream
Fresh parsley, chopped
Picture
Yummy ingredients.
Picture
1. In a medium pot, bring olive oil to medium heat, add in garlic and stir - cook 1-2 minutes.

  May I just make mention of how heavenly the smell of cooking garlic is?
Picture
2. Mix in butter until melted.
Picture
3. Add in salt, pepper, and chicken stock.  Raise heat to high and bring to a rapid boil.  Add pasta and cook as long as box directions say. 

   Here is where I wasn't quite sure what was supposed to happen.  I wasn't sure if once cooked  you were supposed to drain the noodles from the chicken stock or leave it in.  But, the noodles ended up soaking in all the chicken stock - which was also kind of weird, as I wasn't sure if that's what was supposed to happen, or if I should've stopped cooking them before all the liquid was gone. 

4. Reduce heat to medium, and stir in the Parmesan until completely melted. Turn heat off and stir in cream and parsley.  Serve immediately.
Picture
Other's Thoughts: Carolyn absolutely loved it.  She thought it was very tasty and flavorful. She even thought the left-overs the next day were great.

My Thoughts: I wasn't impressed.  It wasn't as creamy as I thought it should've been.  It seemed to stick/glom together - not sure if that was because of the chicken broth cooking off, not enough cream, or what.  It would've been better with pieces of chicken in it - which I'd thought about doing, but didn't want to take the time to thaw and cook it. 

Overall, this was a "meh" recipe for me.  But Carolyn did love it - maybe you will, too.

This next recipe, however, was most excellent.  And I found it went terrifically well with my Broiled Pork Chops with Sage.  This makes a great side dish or snack/meal in itself. 

Herbed Potatoes (original recipe found Here - and, way to go for being from WI. Just sayin', WI ppl make AWESOME food.)
3 red potatoes*
1 TBLS butter, softened
1 TBLS sour cream
1/2 tsp dill weed
Chives, minced
salt and pepper
dash of lemon juice
Picture
Lookin' good, lookin' good. 

  *I should mention at the outset, I found the herb sauce recipe above covers three potatoes well.  So, if you're using 6 potatoes, just double everything, or 9 potatoes, triple it, etc. etc.
Picture
1. Remove strip of skin from around the middle of potatoes. Place potatoes in a sauce pan and cover with water.  Bring to a boil.  Reduce heat, cover and simmer 15 minutes (or until tender).
Picture
I was so proud I was able to peel one completely off in one go :)
Picture
2. In the meanwhile, melt the butter in a small dish and mince up the chives. I minced up one stalk and used a goodly amount of it - just add however much goes well with the amount of sauce you're making.
Picture
3. Add to the melted butter the sour cream, dill weed, chives, salt and pepper, and lemon juice.  Mix.  Drain the potatoes and toss with the sauce.  Serve.
Picture
I absolutely love this recipe.  It is so delicious and a great complementary side dish.  However, I didn't like serving them in this manner - they were very difficult to eat.  They were so large and awkward to cut, and the sauce didn't cover them all when they were cut open.  This is also where I realized the sauce didn't comfortably cover this many potatoes.

I made them a few days later and came up with a solution.  I didn't peal a strip from the middle - I just scrubbed them, put them in the pot and boiled them for 15 minutes, drained them and then cut them up.  Then I threw them in a medium sized mixing bowl and dropped the sauce on top - it was much easier to mix this way, and in the smaller chunks each piece got covered. Much easier to eat, and it looked prettier, too. Score
Picture
I found these herbed potatoes were the PERFECT complement to my Broiled Pork Chops with Sage.  I've always wanted to try one of those expensive tasting menus, where each dish is made to bring out the flavors of the other dishes - because the result is amazing.  Well, dear readers, I found out that's what these two dishes do for each other!  Maybe it's the bit of lemon in each that ties them so succulent-ly together. Now I just need to find the perfect drink, and I've got a one spectacular meal. 

Happy Eating!
2 Comments

PFC - Lemon Blackberry Cheesecake

5/13/2012

2 Comments

 
So, my computer deleted my first, nearly completed draft of this post.  Sigh.  It's not the first time that's happened either.  And every time it pisses me off. Vehemently.  Anyway, here it is, in all it's unrefined, lack-of-witty-sayings glory. Because I was gunna post tonight, and by gum, I won't let anger over technological mishaps ruin my plan. 

This is the second dish I made for my cinco-de-mayo get together (along with the chicken enchilada soup).  Based on reading the comments on the site this recipe is posted, I made some changes to try and make this cheesecake something edible.

Lemon Blackberry Cheesecake (Original recipe here)
4 TBLS butter, melted
1 1/2 C graham cracker crumbs
3 bricks cream cheese
1 1/2 C sugar
3/4 C milk
2 eggs
1 C sour cream
1/2 C all purpose flour
1 TBLS Vanilla extract
2 pints blackberries
zest and juice of 1 lemon

1. Preheat oven to 350 degrees. Mix butter with graham cracker crumbs - press into bottom of 10" spring form pan. Bake 10 minutes.
2. In a large bowl, mix cream cheese and sugar with a hand held mixer until smooth.  Blend in milk, then the eggs, one at a time.  Mix in sour cream, flour, and vanilla - blend until smooth.
3. In a blender, puree 1 pint blackberries with the lemon zest and juice.
4. Add puree to cream cheese mixture. Add in the rest of the blackberries (if there are any left - I'd eaten half the 2nd box as I was going) and mix well.  Pour onto prepared crust and bake 1hr 20min - or until middle is set.  Refrigerate until ready to serve.
Picture
The Players.
Picture
Sugar and cheese - before they got whipped into a frenzied submission by the crazy hand-held nazi mixer.
Picture
Yeap. Right after this picture was loaded is when my computer closed the tab for me. But this picture is so damn pretty, it almost makes me feel a little better.

I'd forgotten I was changing the recipe, so I accidentally added in the original amount of milk. Afraid it might make everything too soupy, I added in more flour. It seemed to work.
Picture
Yeah - this picture definitely makes me feel better.

And it was right after taking this picture and blending the blackberry puree into the cream cheese mixture that I realized I totally should have made this a blackberry swirl cheesecake, instead of blending it all together into a purple cheesecake. Alas.
Picture
Apologies for the terrible lighting.  This is the finished product - the edges are a bit brown because the middle wasn't cooking right, and I didn't want a mess like the last cheesecake I made where the middle didn't set properly.  I was happy because the top didn't crack - and I thought the water bath had done its work (I'd never used a water bath for a cheesecake before). However, when I returned an hour later, having let the cheesecake sit and cool, to my dismay the top had three large gashes across it.  I have no idea why it split open, but it did, and wasn't pretty anymore.  :(

Others' Thoughts: Everyone who tried this cheesecake absolutely loved it!  Little did I know that Sarah (for whom this cheesecake was originally made), loves a hint of lemon in her desserts.  And other friends thought it was delicious and creamy and oh-so-good. Yaa for people liking my food!

My Thoughts: It was...ok.  I didn't like the seeds that kept popping up, and it would've been better as a swirled cheesecake.  I actually preferred the little Cupcake Cheesecakes I was able to make from the leftover crumbs and batter.
Picture
Picture
I thought these were the perfect serving size, and having 1 blackberry for the top really added in a nice burst of juicy flavor.  If I ever make this again, it will definitely all be for Cupcake Cheesecakes.

And to get rid of the seed problem I would just use a few tablespoons of seedless blackberry jam in place of the blackberry pints.

PFC Week 1 Summary:
 I made 3 recipes (skillet lasagna, chicken enchilada soup, and lemon blackberry cheesecake).
 I loved 2 of them (skillet lasagna, chicken enchilada soup).
 I exceeded my goal by 1 recipe (lemon blackberry cheesecake).
2 Comments

2nd Pinterest Challenge Recipe - Chicken Enchilada Soup

5/10/2012

3 Comments

 
 On Cinco-de-Mayo Saturday I made Chicken Enchilada Crockpot Soup and a Lemon-Blackberry Cheesecake (more on that to come - keep checking back, dear readers!).  For all you vegetarians out there, you can obviously cater this to your palate by cutting out the meat and using a vegetable broth instead.  

  It's a pretty easy, mess-free recipe which makes quite a lot - I had left overs for several days.

Chicken Enchilada Crock-pot Soup (Original recipe can be found here)
Olive Oil
1/2 C onion, chopped
3 TBLS garlic, minced
3 C chicken broth
8 oz can tomato sauce
2 chipotle peppers in adobo sauce, chopped
chopped cilantro
15 oz can black beans, drained
2 cans diced tomatoes
bag frozen corn
1 tsp cumin
dried oregano
3 boneless, skinless chicken breasts
Toppings:
sour cream
shredded cheddar cheese
chopped scallions

1. Heat oil in a saucepan, add onion and garlic and saute until soft. Add chicken broth, tomato sauce, and chipotle adobo sauce and bring to a boil.  Add cilantro and remove from heat - pour into crock pot.
2. To the crockpot, add the drained beans, diced tomatoes, corn, cumin, oregano, and stir. Add the chicken breasts.
*3. Cover and cook on low 2hrs.  Remove chicken breasts and shred them. Add back into the crock pot and continue cooking (on high heat) another 1 1/2hrs.  Serve in bowls with sour cream, cheese, and scallions.
Picture
Hello lovely, and (for the most part) healthy ingredients!
Picture
(Please, try to ignore the extraordinarily messy stove-top.  I don't have enough hours in the day to do everything - and cleaning the stove just seems to be one of those tasks that gets endlessly put-off. But I'ma clean it soon - I swear!)
Picture
Look at how pretty it looks! 

I didn't measure the cilantro - I bought a nice looking bunch of it at the market, and chopped what I felt was enough for the soup.  It's one of those "feel it as you go" things. I do that a lot in my kitchen. 

*The original recipe says to cover and cook on low heat 4-6hrs.  Well, this is the only place I differed in my recipe from the original.  I cooked it on low for about 2hrs, and then my friend was coming over, so I whipped that puppy up to high heat for another 1 1/2hrs, and it turned out just fine.

Also, originally I had put in three chipotle peppers from the adobo sauce, with two of them chopped up so the seeds were exposed.  Well, when I went to check how it was cooking in the crockpot, I took a little taste and had a massive coughing fit because it was super hot. I'd heard the chipotle adobo sauce was pretty intense, but I scoffed because I enjoy my food hot and spicy.  Haha.  Oh, Julia.  After coughing half a lung up, I was worried the soup was ruined. However, with fearless determination, I dove into the soup with a slotted spoon and fished out the 1 whole pepper I had left in there, and several bits of chopped up pepper, in a hope to lessen the hotness factor halfway through the game.  Well, crisis averted, and the soup was wonderfully delicious!
Picture
This soup was very flavorful and filling, and Sarah loved how colorful it was.  I mean, you know it's healthy if it's colorful. Right...?

And apologies for not getting a shot of shredding the chicken - I still forget I am supposed to photograph my steps :P

Happy Cooking, dear readers!
3 Comments

1st Pinterest Challenge Recipe

5/6/2012

4 Comments

 
Well, dear readers, I accomplished my first week of my Pinterest Food Challenge.  I ended up making 3 new dishes, and each one pretty darn delicious.  I managed to remember to take pictures (though I always started making the dish, and then I'd remember I was supposed to photograph my steps and would then commence to scramble to gather all the ingredients together and try to smush them onto my little kitchen countertop for a picture). 

The first recipe I made for my Pinterest Food Challenge was Skillet Lasagna.  Invariably, with all my dishes I change/invent/adapt/make it up as I go along. I used to be of the mind that I would try a recipe exactly as it was written, and the next time I made it I was allowed to change it up.  That, dear readers, did not last long.  It's expensive and boring and I felt it limited my creativity :P  But, in case you want to make the recipe exactly as it was first written, here's the site linked to my Pinterest pic: Easy Peasy Skillet Lasagna.

So, here's the recipe I ended up writing in my recipe book, and below it (and with visual assistance), I will elaborate on what I actually did :)

Skillet Lasagna:
1lb Ground Beef
1/2 Onion, chopped
2 cloves garlic, chopped
Veggies (mushrooms, asparagus, zucchini, whatever you enjoy/have in the fridge)
1 can diced tomatoes
1 can tomato sauce
3 Basil leaves, chopped
salt and pepper, to taste
Ricotta Cheese
Mozzarella Cheese
Parmesan Cheese
Parsley
Lasagna Noodles (broken into thirds)

1. Start Noodles Cooking. Brown meat in a large skillet - drain grease.
2. Add Onion, garlic, and veggies to meat - cook about 5 minutes (until tender). Add canned tomatoes, tomato sauce, and spices.
3. Drain noodles, add to meat and veggies.  Add cheeses in liberal amounts. Top with Parsley and serve.

Picture
Look at all these lovely ingredients.  The Parmesan was being a diva and didn't want to share the counter with the other ingredients. The pineapple kindly agreed to stand-in. Thanks, Pineapple!
Picture
Browning the meat.  It looks gross now - but it will be oh, so delicious.
Picture
I added thinly sliced zucchini since I had one in my 'fridge.  There is something glorious about onions, garlic, and meat.  Mmmm.
Picture
Here's how the noodles are supposed to be broken.
Picture
Add the canned tomatoes and tomato sauce.  I only used one can of diced tomatoes, though the original recipe called for 2 cans.  I used an 8oz can of tomato sauce, but also added in some extra spaghetti sauce I had to thicken it up a bit. 

I also didn't have any fresh basil, so I just sprinkled dried basil on top.
Picture
Add noodles.  Stir around a bit.
Picture
In my book, you can never have too much Ricotta Cheese - it's the magic ingredient that makes lasagna a near-divine dish. So, add a lot.  Then add some more.  Stir it around, get it melted and thoroughly mixed in.
Picture
I sprinkled some Parmesan Cheese then piled on the Mozzarella.  I got a bag of the shredded stuff, and used most of it.  Notice how I didn't have any measurements for the cheeses - you can't ever have too much cheese. 
Picture
When you serve it onto a plate, you should experience a situation like in the pizzeria scene in Top Secret.  If you do, you've done it right :)
Picture
Here's a picture of the finished product.
Picture
Aaaand, one more. Because it looks so, so very good.  All that cheesy, hot, gooey, yummy wonderfulness. And I still have left overs! 

When I crave lasagna, I want it right away - not later that night.  And this recipe is very accommodating of my urgently hungry demands :) So, there it is, my dear readers.  A quick, fantastic recipe for you to try out if you love lasagna, but don't want the hassle of hours and hours of work.  All in all, this recipe takes a grand total of 10 minutes!!  I served it with a nice Cabernet Sauvignon.
4 Comments
<<Previous
Forward>>

    Author

    Actress, Singer, Dancer, Food Enthusiast, Animal Lover, Writer.

    Archives

    June 2017
    October 2014
    September 2014
    August 2014
    July 2014
    June 2014
    May 2014
    April 2014
    March 2014
    February 2014
    January 2014
    December 2013
    November 2013
    October 2013
    September 2013
    August 2013
    July 2013
    June 2013
    May 2013
    April 2013
    March 2013
    February 2013
    January 2013
    December 2012
    November 2012
    October 2012
    September 2012
    August 2012
    July 2012
    June 2012
    May 2012
    April 2012
    March 2012
    February 2012

    Categories

    All
    Career
    In The Kitchen
    Musings
    Nyc
    PFC
    Travel

    RSS Feed

Powered by Create your own unique website with customizable templates.